


Montessori Learning Tower DIY (Laura for Team Mama)

In questa pagina
Laura, a Montessori mum and reader of La Tela, built this DIY learning tower for her son Toli and was so kind as to share how she did it with us for Team Mama.
I’ll leave you in her hands, but first I need to thank her… Oliver loves watching Alex while he cooks so we didn’t waste any time, on Friday we bought all the materials and on Saturday we made our own learning tower.
This is the result.

As you can see from the picture above, we slightly changed Laura’s design, using only four flat bars at the top as to form a frame around the structure. These are the measurements of our bars:
4 square based bars (vertical ones): 40cm long as to reach a total high of 90cm
2 rectangular based bars (front and back): 42cm long
2 rectangular based bars (sides): 24cm long
Update
After two years of using this IKEA DYI learning tower, I’d like to add that: 1. we restored it once by sand-papering the wood, and it became like new; 2. we never had accidents as it’s extremely stable; 3. I especially like the hole on the base where the feet rest, because it’s a great place where to grab to climb up.
Alternative
If you don’t want or don’t have time to build your own (time is also money!), I recommend the Montessori Learning Tower by Woomo that we’re now using for Emily (I picked it among all the other options, and it met all my expectations).
Post by Laura, mum of Toli (17 months)
My son Toli has chronic mamitis, which I love… except when it’s time to cook. Preparing something decent to eat can be a real challenge with a clingy baby pulling of your pants. When looking for a solution, I ran into the Montessori learning tower: it’s a structure that allows the baby to do activities at the same height as the parents and in a safe, independent way. For Earthquake Toli a simple chair wasn’t enough!
My version of it is one of those famous IKEA Hacks and it’s very easy even for someone like me who’s not very handy.
This is what you need:
A Bekväm stool, from Ikea
Four square-based wooden bars (in my case 39 cm long to match the kitchen countertop. My counter is 89 cm and the IKEA stool is 50).
3 flat (rectangular-based) wooden bars 36 cm long
2 flat wooden bars 24 cm long
14 long screws
A drill
A screwdriver
A saw (if you want to cut the bars yourself, although I recommend you have them cut at the shop. Here in Spain in the bricolage shop Akí they cut them for free if you have the member card)
A pencil
In the left picture, you can see all the bars, still to cut, and in the right one the difference between the square-based ones and the flat ones.


Let's get to work!
Assemble the IKEA stool—everything except the upper shelf, the one with the hole in it. Put this shelf upside down, and draw the silhouettes of the square-based wooden bar in each corner of the shelf. Cross the diagonals of each square to find the middle point, like so:


Using a drill bit smaller than the screw we’re going to use, drill those four points, and insert the four screws, which need to be as long as to go through the shelf and into a good part of the wooden bar. Screw the four wooden bars onto them and attach this structure to the IKEA stool. We’ll end up with a structure like in image 1 (below).
At this point, we only have to screw the flat wooden bars in position. I put two on the front, one on the back (the step side) and one on each side, like in picture 2 (or alternatively you can create a frame at the top, like Carlotta did).


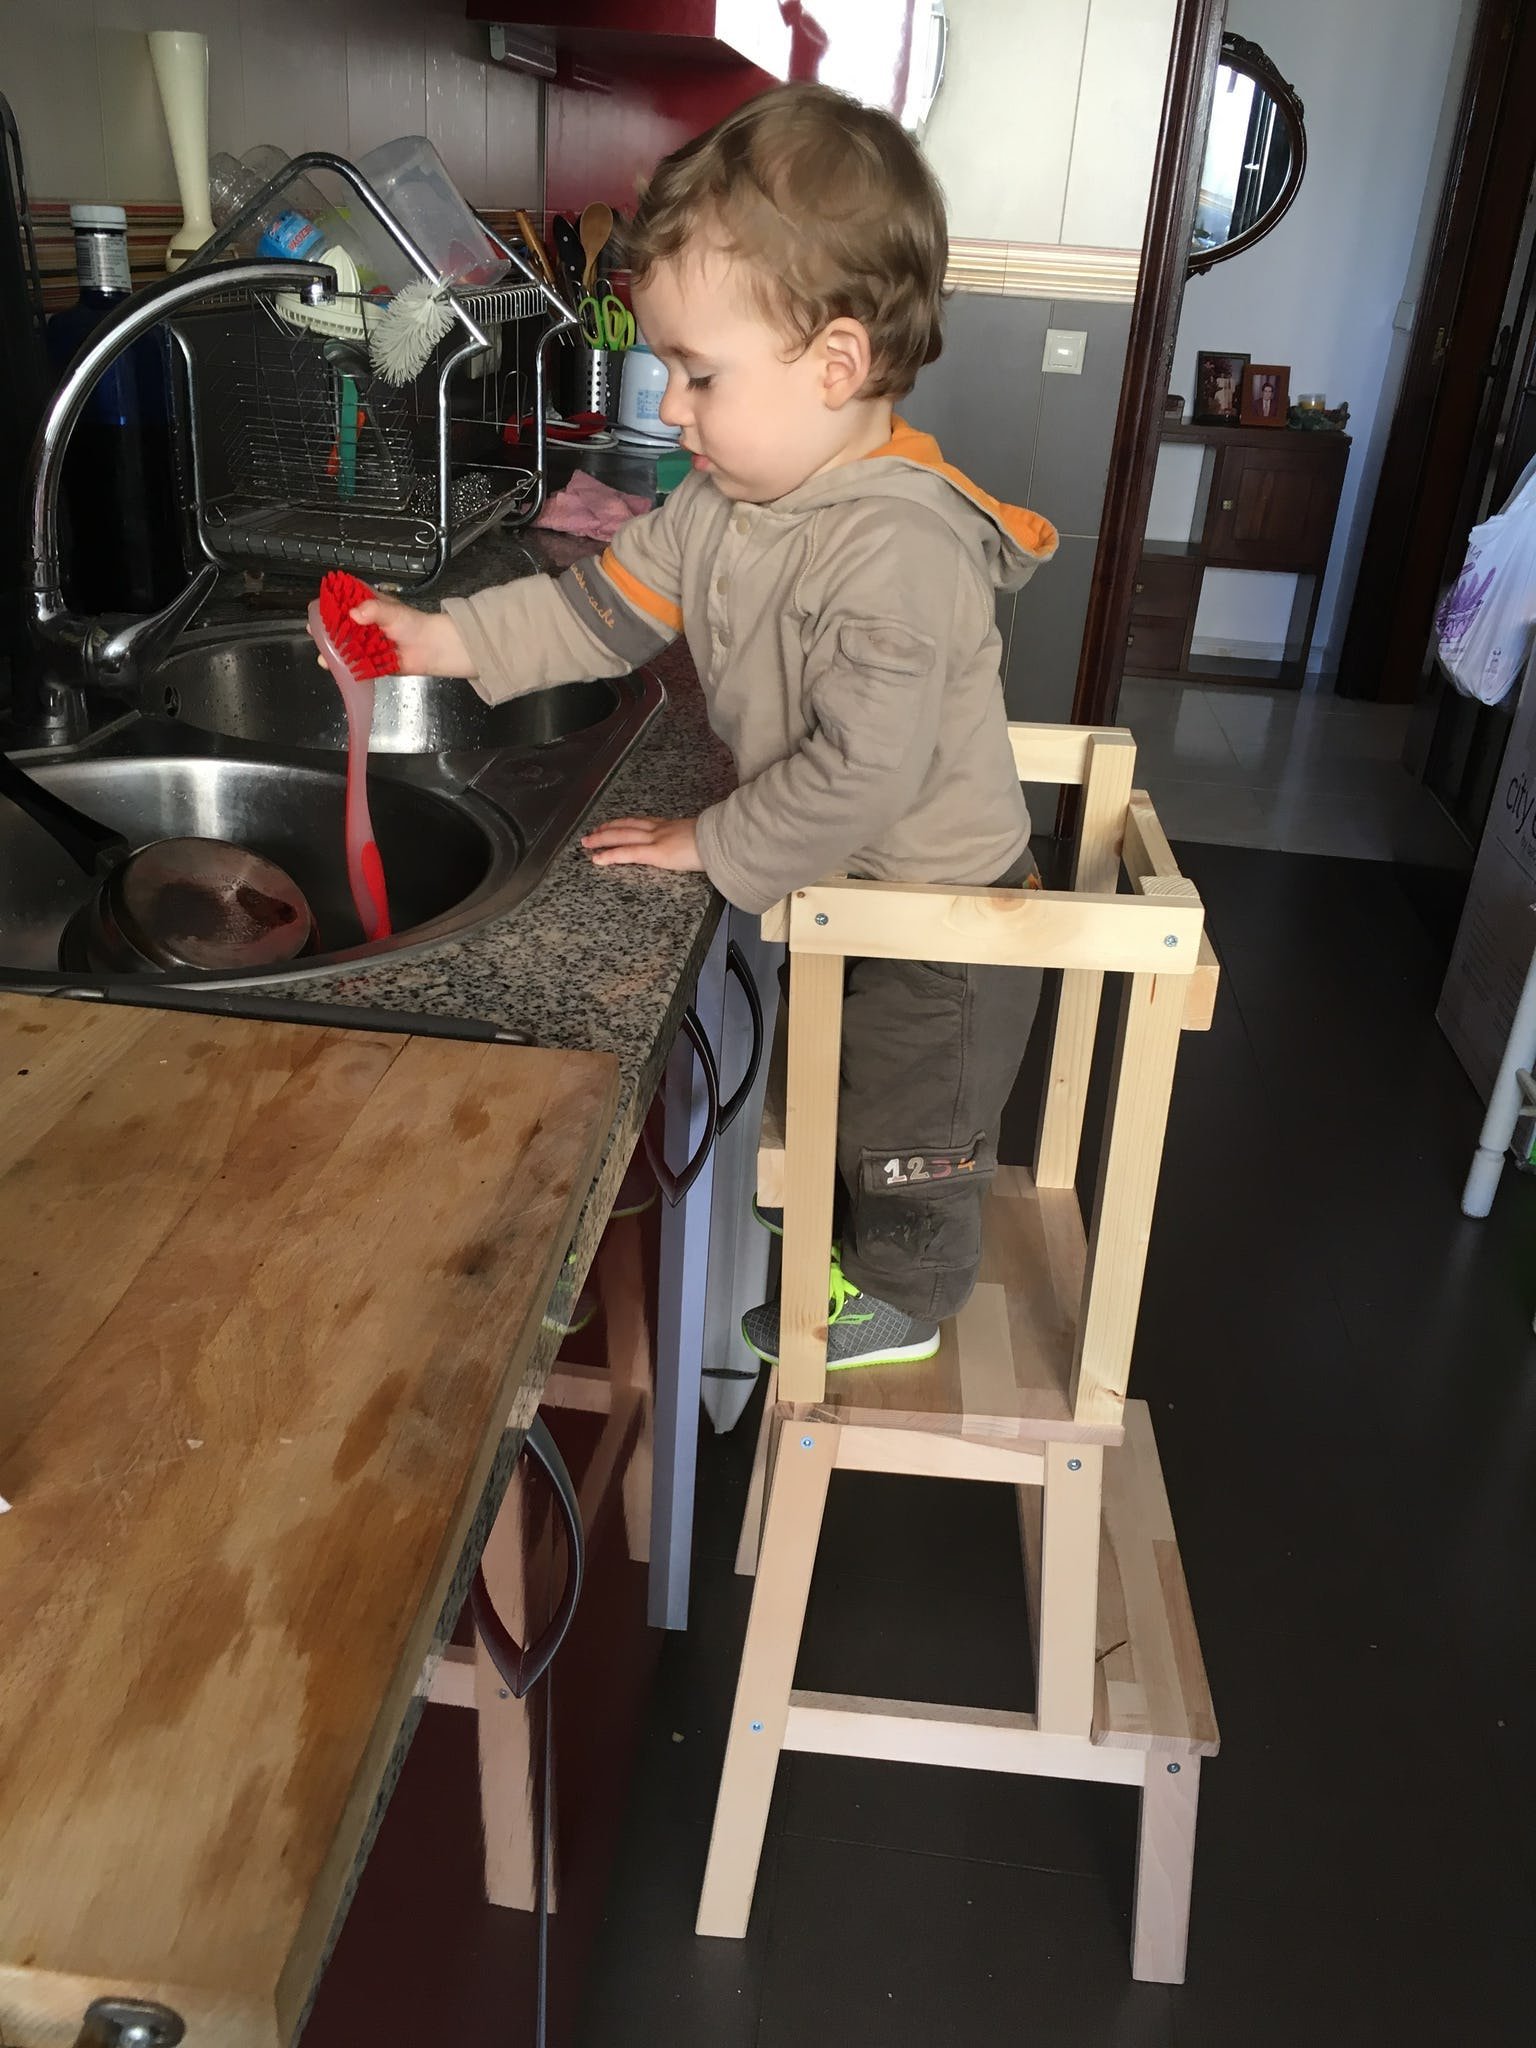
Our Montessori learning tower is now ready to be used and enjoyed. Toli loves using the red washing brush to hit a pan or pot. Or often I give him a toy where he has to cut with a knife fruit and vegetables kept together by velcro so he feels like he’s doing the same as me. Or I give him a cloth to clean the countertop or pasta to move from one bowl to the other and back.
And mummy can finally cook in peace!


